Paper Weaving for Adults: A Woven Paper Mat, Step by Step
Cut slits in one sheet, weave strips of a second color through them, and finish with a crisp two-color checkered mat 8 inches square.
Project at a glance
Materials
- One sheet of cardstock, US Letter or A4, for the base
- One sheet of contrasting paper for the weft strips
- Glue stick or double-sided tape
- An 8 in (20.3 cm) square of paper to cover the back (optional)
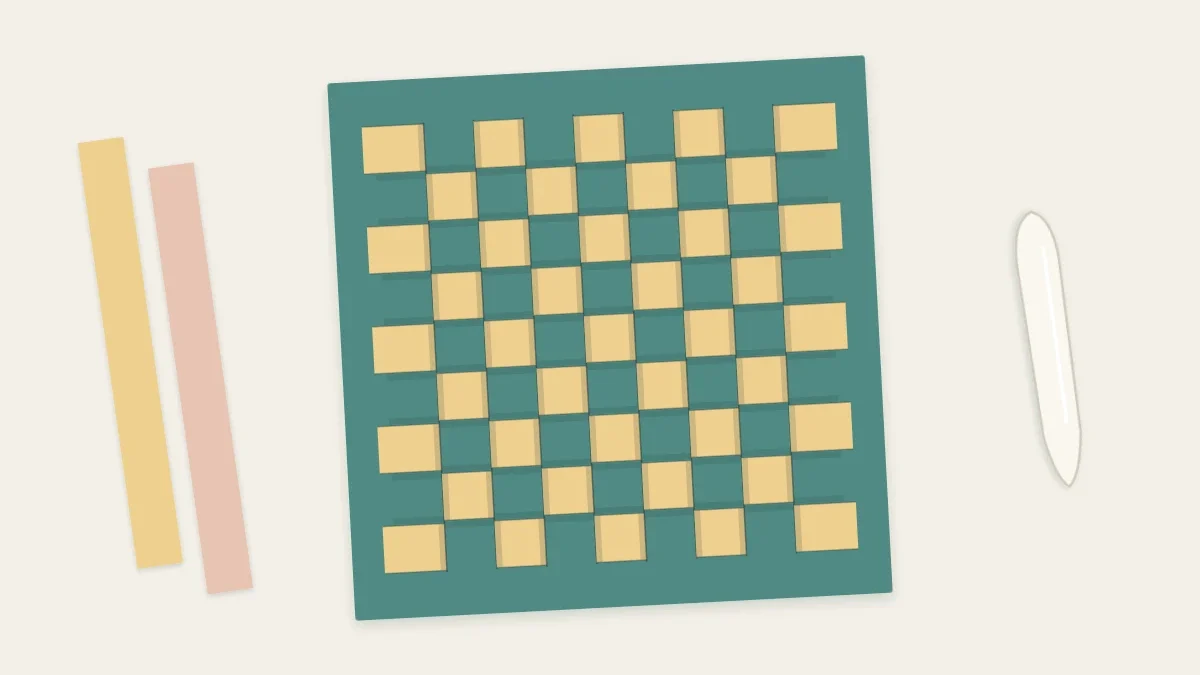
Take one sheet of paper, cut a row of slits in it, and thread strips of a second color through them. That is all paper weaving asks, yet the checkered surface it produces looks considered and precise. This project makes a two-color woven mat 8 in (20.3 cm) square with a plain border, suitable for framing, mounting on a card or simply propping on a shelf.
How the Mat Is Built
Weavers call the fixed lengthwise threads the warp and the threads that travel across them the weft. Here the warp is not a set of loose strips but a single sheet with slits cut into it. The uncut border holds everything in register, so nothing needs taping down and the bands cannot drift apart. The weft is a set of separate strips woven across, one row at a time.
The dimensions are chosen to divide evenly:
- Base sheet: 8 x 8 in (20.3 x 20.3 cm), with a 1 in (2.5 cm) border on all four sides.
- Woven area: 6 x 6 in (15.2 x 15.2 cm).
- Nine slits, 3/4 in (1.9 cm) apart, giving eight bands.
- Eight weft strips, each 3/4 x 7 1/2 in (1.9 x 19 cm).
Choosing the Two Papers
Use cardstock of about 65 lb (176 gsm) for the base. It stays flat and its bands hold their shape as strips are pushed through. The weft strips can be the same weight or a little lighter; text-weight paper around 24–28 lb (90–105 gsm) slides more easily and is kinder to a first attempt.
Contrast matters more than color. A dark base with a pale weft, or the reverse, shows the checker clearly. One US Letter sheet (8.5 x 11 in) of each color is enough; A4 works equally well.
Cutting the Base
- Square the sheet. Trim the base cardstock to an 8 in (20.3 cm) square. Check that the corners are true against the grid of the cutting mat.
- Draw the border. On the back, rule a light pencil line 1 in (2.5 cm) in from each edge. These four lines frame the 6 in (15.2 cm) woven area.
- Mark the slit positions. Along the top and bottom border lines, make a tick every 3/4 in (1.9 cm), starting at one side border line and ending at the other. You should have nine ticks on each line, including the two that sit on the side border lines.
- Cut the nine slits. Lay a metal ruler between each pair of ticks and cut from the top border line to the bottom one. Use light pressure and two passes rather than one heavy one. Do not cut into the border.
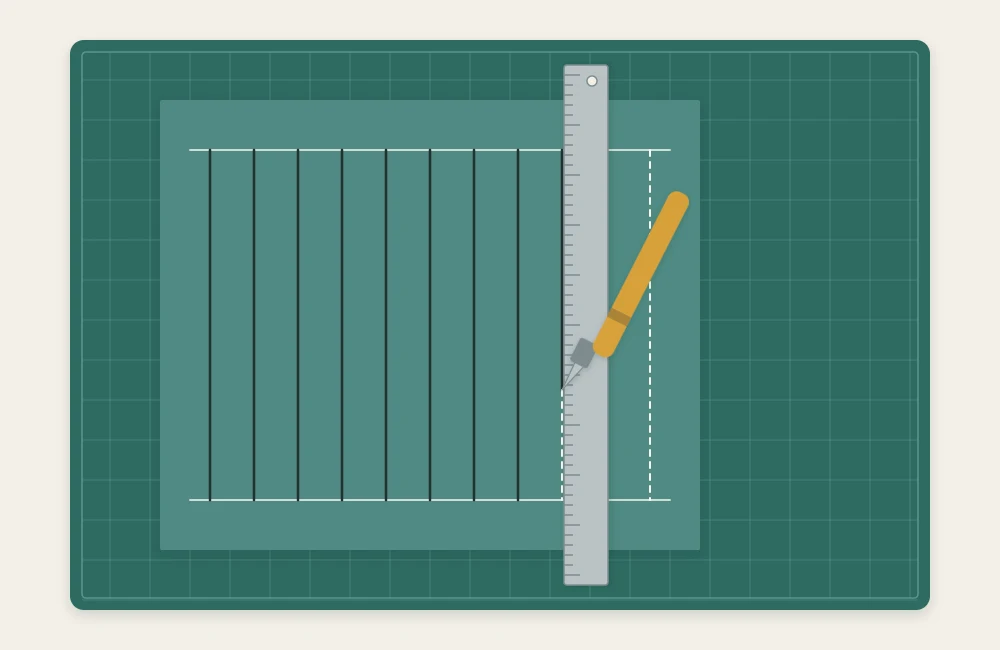
Straight, evenly spaced slits are the whole foundation of this project. If your lines tend to wander, the advice on cutting cleanly along a ruler is worth reading first.
Watch out
Stop each cut exactly on the border line. A slit that runs even slightly into the frame weakens it, and the tear spreads as you weave. Start the blade just inside the line and finish the last fraction from the opposite direction.
Cutting the Weft Strips
- Trim the second sheet. Cut the weft paper to 7 1/2 in (19 cm) in one direction.
- Cut eight strips. Slice it into strips 3/4 in (1.9 cm) wide, giving eight pieces of 3/4 x 7 1/2 in (1.9 x 19 cm). Cut one or two spares.
The strips are longer than the woven area on purpose. The extra 3/4 in (1.9 cm) at each end hides behind the border, where it is glued later.
Weaving
Work with the base face up. Every strip begins and ends behind the border, out of sight.
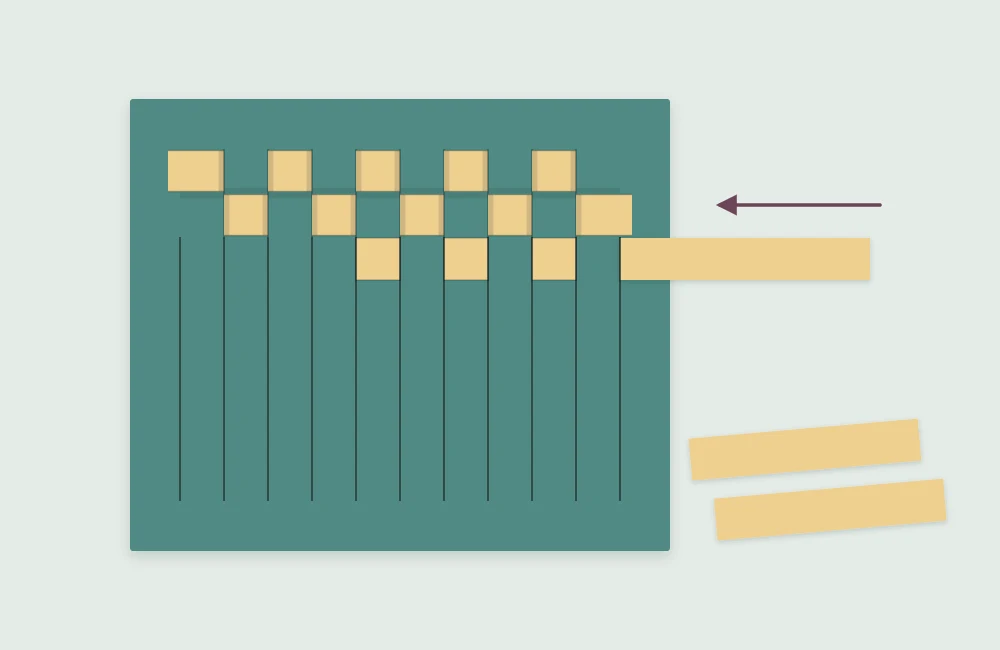
- Start the first row. From the back, bring one end of a strip up through the first slit on the left. Pass it over the first band, down through the second slit, under the second band, and up through the third.
- Finish the row. Continue over and under across all eight bands. The strip finishes under the eighth band and stays behind the right-hand border.
- Seat the strip. Center it so equal lengths sit behind the left and right borders, then slide it up until it rests against the top ends of the slits.
- Weave the second row in reverse. Slide the next strip in from the back so it passes under the first band, comes up through the second slit, and goes over the second band. It finishes over the eighth band and down through the last slit.
- Close the gap. Push the second strip up against the first so no base color shows between them. Nudge it at several points along its length rather than from one end.
- Repeat. Alternate the two rows until all eight strips are in place. The last strip is the tightest; curve it slightly between your fingers to ease it under the bands.
Securing and Finishing
Turn the mat face down. Lift each strip end in turn, put a small dab of glue or a short piece of double-sided tape on the border beneath it, and press the end down.
The back now shows the pencil lines and the strip ends. To hide them, glue a second 8 in (20.3 cm) square of paper over the whole back, or mount the mat on a larger sheet of cardstock as a mat board. Press it under a heavy book for half an hour so it dries flat.
A finished mat can go into a square frame, or be trimmed to sit on the front of a large card; the basics of card sizes and bases are covered in the beginner’s guide to card making.
When the Pattern Looks Wrong
- Two neighboring rows match. A row was started the same way as the one before it. Pull it out and reweave, beginning under instead of over.
- Gaps open between rows. The strips are narrower than the band spacing, or were not pushed together. Close them up before gluing any ends.
- The last strip buckles. The strips are a touch wide. Shave a sliver from one long edge rather than forcing it.
- The base ripples. Too much wet glue at the back. Tape or a glue stick is safer on this project.
Changing the Pattern
Once the plain checker is familiar, small changes to the cutting produce very different results. Cut the slits as gentle, parallel waves instead of straight lines and the squares appear to ripple. Vary the spacing, with narrow bands at the center and wide ones at the sides, for a design that seems to bulge. Alternate two weft colors row by row for stripes across the check.
For a much smaller version of the same technique, try the woven design among these three bookmark projects. If you would rather stay at a larger scale, the same patient, repetitive rhythm carries over to a wreath built from layered paper leaves.
Frequently asked questions
Can I do paper weaving with scissors instead of a craft knife?
Yes, with a small change. Fold the base sheet in half and cut the slits from the fold toward the open edges, stopping 1 in short. A knife and ruler give straighter slits and avoid a center crease.
Why are my woven strips buckling?
The strips are slightly wider than the space available or the paper is too thick for the slits. Trim a sliver from the long edge of the strip, or switch to a lighter paper for the weft.
How do I keep the strips from sliding out?
Each strip is cut longer than the woven area so its ends sit behind the border. A dab of glue or a piece of double-sided tape under each end holds it in place.