How to Make a Paper Gift Box With a Lid
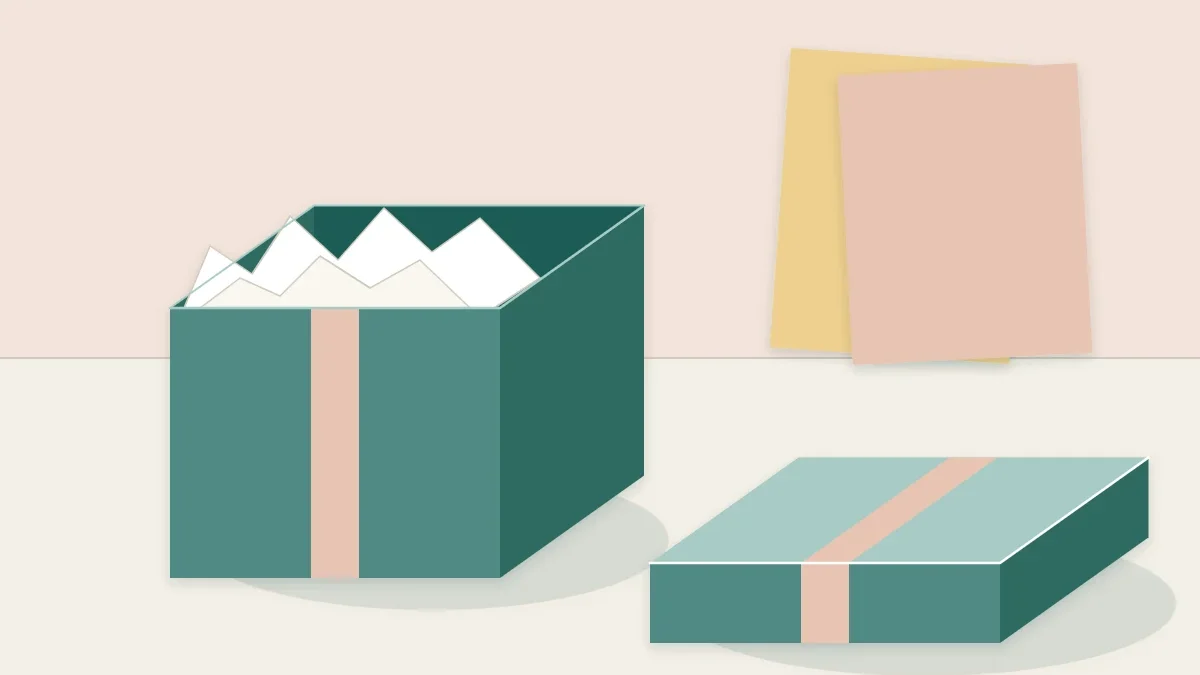
Two squares of cardstock, eight score lines and a few corner cuts make a sturdy lidded box. Includes the two measuring rules that let you size it for any gift.
Project at a glance
Materials
- 1 cardstock square, 6 x 6 in (15.2 x 15.2 cm), for the base
- 1 cardstock square, 5 1/8 x 5 1/8 in (13 x 13 cm), for the lid
- Tacky PVA glue or strong double-sided tape
- Scrap cardstock of the same weight for a test box
A small present feels more considered when the packaging is made for it. This paper gift box is built from two squares of cardstock, one for the base and one for the lid, each scored, cut at the corners and glued into a shallow tray. There is no printed template to hunt for and nothing to trace: once the logic of the measurements is clear, the box can be made in any size that fits on a sheet.
How the Box Works
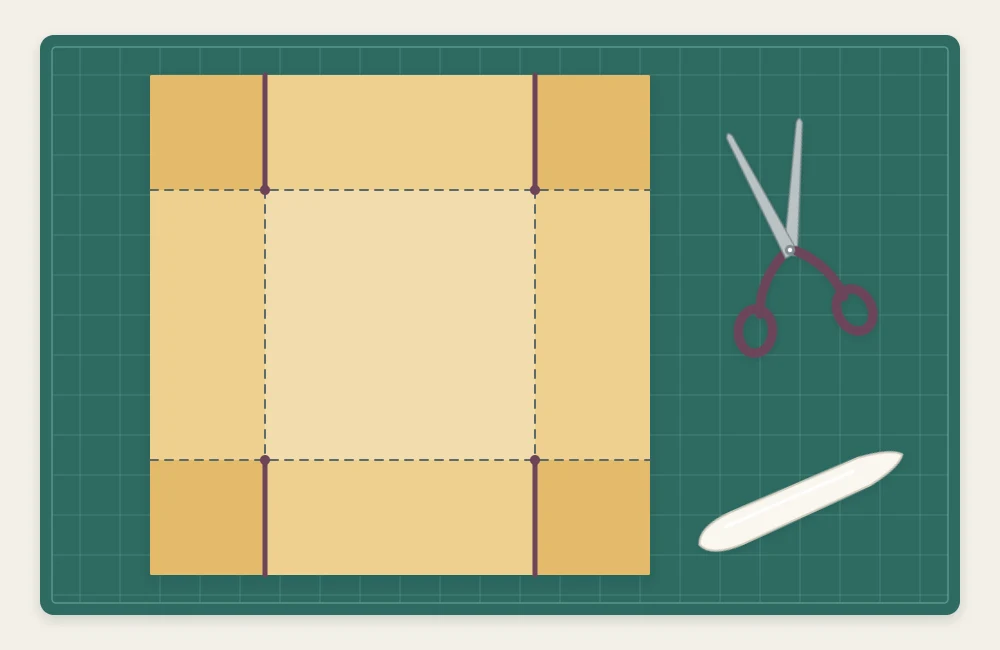
Each half starts as a square. Four score lines, one parallel to each edge, mark out a smaller square in the middle that becomes the floor. The strips around it fold up as walls, and the four small corner squares become tabs that are glued inside to hold the walls together.
Two simple rules set every measurement:
- Square size = floor width + 2 × wall height. A 3 in floor with 1.5 in walls needs a 6 in square.
- The lid floor is 1/8 in (3 mm) wider than the base floor. That small allowance makes room for the thickness of the base walls and of the tabs glued inside the lid. Without it the lid will not go on.
The lid walls are usually shorter than the base walls, so some of the base shows and the lid is easy to grip. The instructions below make a box with a 3 in (7.6 cm) square floor, 1.5 in (3.8 cm) deep, which suits jewelry, candles, chocolates or a rolled pair of socks.
Paper and Tool Notes
Cardstock of 65 to 80 lb (176 to 216 gsm) is the practical range. Lighter paper makes a box that dents, and heavier board is hard to fold cleanly at this scale. Solid-core cardstock, colored all the way through, hides the cut edges better than paper with a white core. If you are unsure what you have, the guide to paper weight and finish explains how to judge a sheet.
Accuracy matters more here than in most projects, because an error of 1/16 in (1.5 mm) is half the lid allowance. Use a metal ruler, a sharp pencil and a craft knife or paper trimmer, and cut both squares from the same sheet where possible so the two halves match.
Step-by-Step Instructions
- Cut the two squares. Cut a 6 × 6 in (15.2 × 15.2 cm) square for the base and a 5 1/8 × 5 1/8 in (13 × 13 cm) square for the lid.
- Score the base. On the inside face of the base square, score a line 1.5 in (3.8 cm) from each of the four edges. The lines cross near the corners and leave a 3 in (7.6 cm) square in the center.
- Score the lid. Score the lid square 1 in (2.5 cm) from each edge. The center square should measure 3 1/8 in (7.9 cm), slightly larger than the base floor. Measure it now, before any cutting, and redo the lid if it is not.
- Make the corner cuts. On each square, pick two opposite sides. From each of those two edges, cut inward along the score lines, stopping exactly where they meet the crossing score line. That is four cuts per square. Each corner square is now a tab, still attached to one wall along a score line.
- Taper the tabs. Trim a thin sliver, about 1/16 in (1.5 mm) at the widest, from the two free edges of each tab so it narrows slightly toward its outer corner. Tapered tabs slip into place without catching on the fold or showing above the wall.
- Fold every score line. Fold all four walls and all four tabs inward along the scores, then flatten the sheet again. Pre-folding everything first makes assembly far easier.
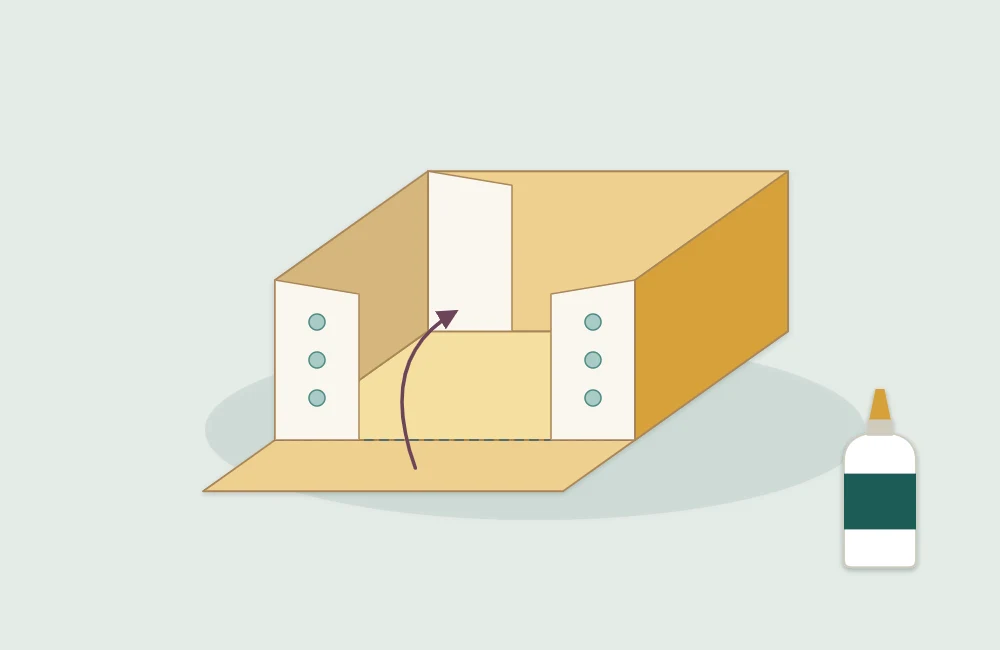
- Glue the base. Stand up the two walls that carry the tabs and fold the tabs in at right angles. Apply a thin line of glue to the inside of the remaining two walls, near each end, then raise those walls and press them against the outside of the tabs. The tabs end up hidden inside the box.
- Hold until set. Pinch each corner for about thirty seconds, or use small clips with scrap paper under the jaws to prevent marks. Check that the top edges of the walls line up.
- Assemble the lid. Repeat the folding and gluing steps with the lid square. Let both halves dry for at least fifteen minutes before fitting them together.
Tip
Make the first box from scrap cardstock of the same weight as your good paper. Card thickness changes how snug the lid is, and a trial run shows whether the 1/8 in (3 mm) allowance needs to go up or down slightly.
Other Sizes
Apply the two rules to any size. These three fit on US Letter or A4 cardstock:
| Box | Base square | Base score distance | Lid square | Lid score distance |
|---|---|---|---|---|
| Small, 2 in (5.1 cm) floor | 4 in (10.2 cm) | 1 in (2.5 cm) | 3 5/8 in (9.2 cm) | 3/4 in (1.9 cm) |
| Medium, 3 in (7.6 cm) floor | 6 in (15.2 cm) | 1.5 in (3.8 cm) | 5 1/8 in (13 cm) | 1 in (2.5 cm) |
| Large, 4 in (10.2 cm) floor | 8 in (20.3 cm) | 2 in (5.1 cm) | 6 1/8 in (15.6 cm) | 1 in (2.5 cm) |
For a rectangular box, start with a rectangle instead of a square and keep the score distance the same on all four sides. Add the 1/8 in (3 mm) allowance to both the length and the width of the lid floor.
When Something Goes Wrong
- The lid is too tight. The lid floor is too small or the score lines wandered. Remake the lid with an extra 1/16 in (1.5 mm) on the square.
- The lid is loose and rattles. Heavier cardstock in the base, or a liner glued inside the lid, takes up the slack.
- The folds crack or look soft. The scores were too light or missing. The article on scoring cardstock before folding covers pressure, tools and which side to score.
- The corners spring open. Glue stick rarely holds a folded corner under tension. A tacky PVA or strong double-sided tape grips faster; see which adhesive suits which job.
Finishing Ideas
A plain box in a good color needs very little. Cut a square of patterned paper 1/8 in (3 mm) smaller than the lid top and glue it on as a panel, or line the floor with a contrasting square. Wrap a narrow paper band around the closed box in place of ribbon, and add a handmade tag or a paper bow from the guide to tags, bows and bands.
Frequently asked questions
How much bigger should the lid be than the box?
Make the floor of the lid about 1/8 in (3 mm) wider than the floor of the base in each direction. Card thickness affects the fit, so test with scrap cardstock of the same weight and adjust by 1/16 in (1.5 mm) if the lid is tight or loose.
What size paper do I need for a gift box?
The square equals the floor width plus twice the wall height. A box with a 3 in floor and 1.5 in walls needs a 6 in square for the base. The lid square is the lid floor, 3 1/8 in, plus twice the lid wall height.
Can I use regular paper instead of cardstock?
Copy paper makes a box that dents and loses its shape easily. Cardstock between 65 and 80 lb (176 and 216 gsm) holds square walls and still folds cleanly at this size.