DIY Paper Lanterns: A Clean, Modern Cut-Paper Lantern
One sheet of cardstock, ruled cuts and a battery LED tea light make a calm, architectural lantern for a shelf or table.
Project at a glance
Materials
- 1 sheet of 65 lb (176 gsm) cardstock, US Letter or A4
- Double-sided tape or tacky glue
- 1 battery LED tea light
- Optional: vellum or tracing paper for an inner sleeve
Most people meet DIY paper lanterns as a rushed classroom project, cut freehand from construction paper. The construction itself deserves better. A sheet slit from a center fold and rolled into a cylinder is a genuinely elegant form, and when the cuts are ruled, evenly spaced and made in decent cardstock, the result is a calm, architectural piece for a shelf or dinner table. This version uses one sheet of US Letter paper and is lit only by a battery LED tea light.
What you are making
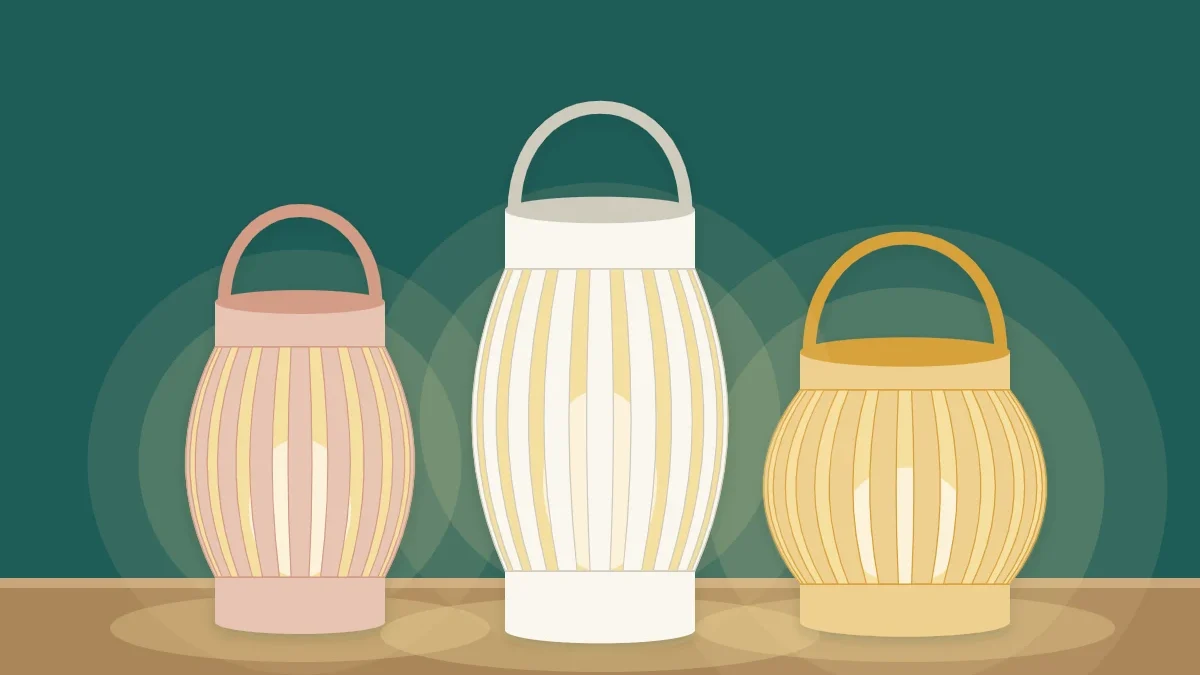
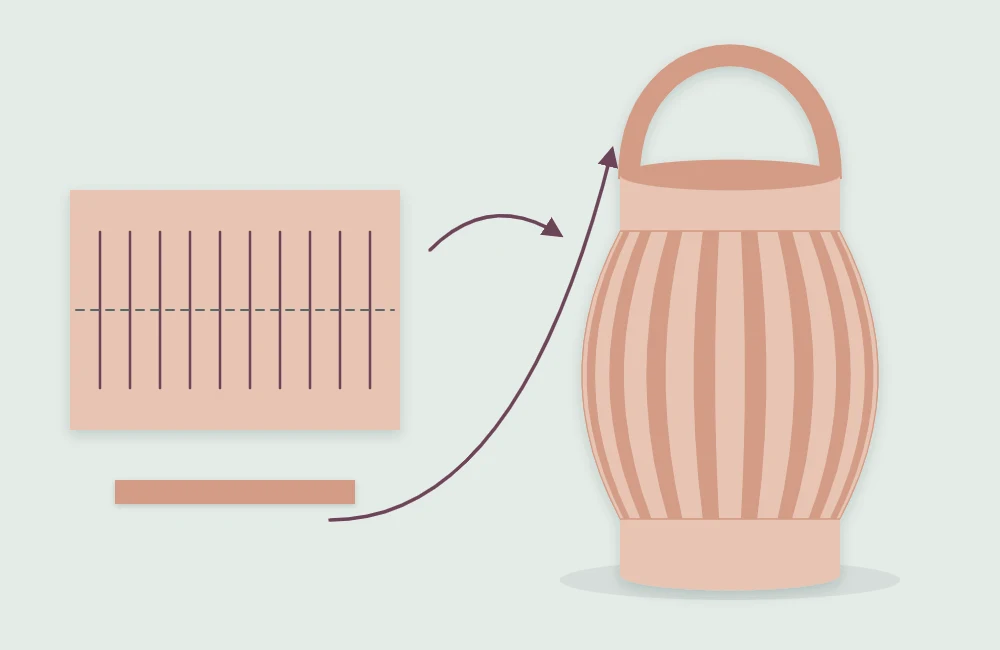
The finished lantern is an open-ended cylinder about 3 in (7.6 cm) across and a little under 8.5 in (21.6 cm) tall, with eighteen vertical slats that bow gently outward at the middle. It has no base: it simply stands over an LED tea light, and the light escapes through the gaps between the slats. A narrow strip across the top works as a handle, which is decorative on a table lantern and functional on a hanging one.
Paper and tool notes
A 65 lb (176 gsm) cardstock is the easiest weight to work with. It is stiff enough to stand up without sagging and still rolls into a cylinder without cracking. Lighter text-weight paper lets more light through but tends to slump, and anything much heavier than 80 lb cover fights the curve. If you are unsure what you have, the guide to paper weight, finish and grain explains how to judge a sheet by hand. Where you can, roll the cylinder with the grain running top to bottom, so the paper curves willingly.
The clean look depends on straight, parallel cuts, so a craft knife and metal ruler do a better job than scissors here. If knife work is new to you, read through how to make clean cuts with a craft knife first and practice a few slits on scrap.
Mark and cut the sheet
- Trim the handle strip. Cut a 1 in (2.5 cm) strip from one short end of the Letter sheet. Set the strip aside. The main piece now measures 8.5 × 10 in (21.6 × 25.4 cm).
- Score and fold the center line. Score a line down the middle of the long dimension, 4.25 in (10.8 cm) from each long edge, then fold the sheet in half so the two long edges meet. The scoring and folding guide covers the technique if your cardstock cracks.
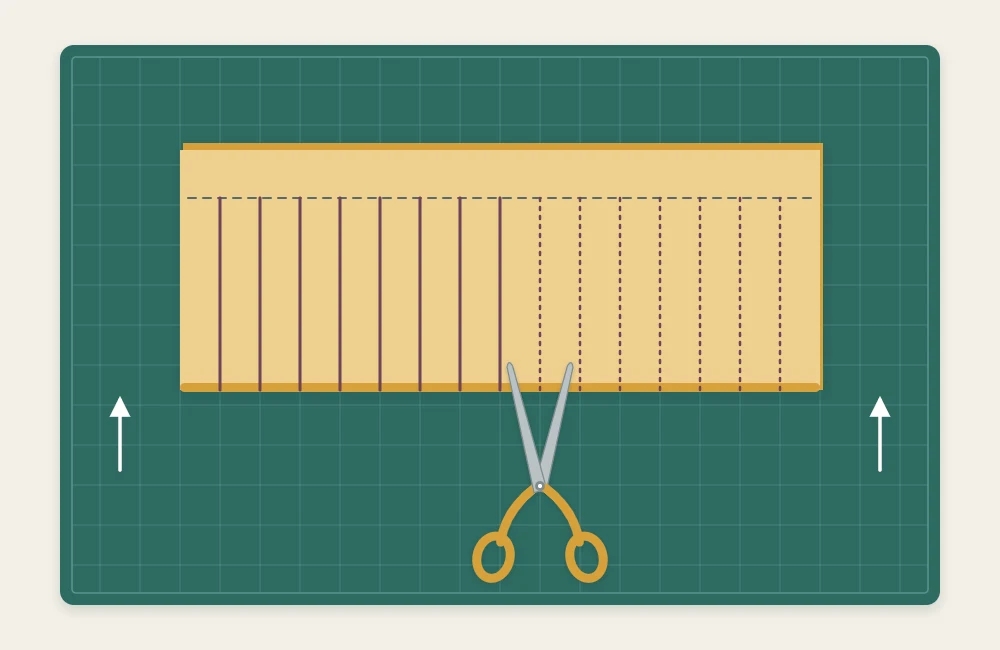
- Rule the stop line. With the sheet still folded, draw a light pencil line 3/4 in (2 cm) in from the open long edges. No cut may cross this line; the uncut band becomes the top and bottom rim of the lantern.
- Mark the cut positions. Along the fold, make a small tick 1/2 in (1.3 cm) from one short edge, then every 1/2 in after that. The last tick should land 1/2 in from the far short edge, giving nineteen ticks in all.
- Cut from the fold to the stop line. Hold the ruler square to the fold and cut through both layers at every tick, starting at the fold and stopping exactly at the pencil line. Use two light passes rather than one heavy one.
Roll and assemble
- Open the sheet and erase. Unfold the paper and gently rub out the pencil lines. The slats are now attached at both rims and creased across the middle.
- Join the cylinder. Run a strip of double-sided tape, or a thin line of tacky glue, down one 1/2 in end margin. Roll the sheet so the short ends meet and lap one end margin fully over the other. Line up the top and bottom rims before you press the seam closed.
- Shape the slats. Stand the cylinder up and press down lightly on the top rim. The slats will kink outward along the center crease. Run a finger around the inside to even them out.
- Attach the handle. Glue each end of the reserved strip to the inside of the top rim, on opposite sides, with about 1/2 in (1.3 cm) of overlap at each end. Hold with a paper clip until set.
Lighting it safely
Switch on a battery LED tea light, set it on the table, and lower the lantern over it. The cylinder is wide enough to clear a standard LED tea light with room to spare. For a hanging lantern, a short string of battery micro LEDs threaded loosely inside does the same job without needing a base.
Watch out
Never put a real candle, wax tea light or any other flame inside or near a paper lantern. Paper ignites easily and this design has no base or heat shield. Battery LED lights only. The National Fire Protection Association publishes general guidance on candle safety at home.
What goes wrong, and why
- Cuts that overshoot the stop line. The rim tears when the lantern is rolled. Stop a hair early; you can always extend a cut.
- Uneven slat widths. These show immediately once the lantern is lit. Measure the ticks rather than estimating them.
- A twisted cylinder. This happens when the rims are not aligned at the seam. Check both ends before pressing the tape down.
- Glue squeezed out at the seam. Use less than you think you need, or switch to tape.
Variations worth trying
Changing the slat width changes the character of the piece. Slats 1/4 in (6 mm) wide give a finer, more delicate cage; 3/4 in (2 cm) slats look bold and graphic. Whatever width you choose, make sure it divides evenly into the length between the two end margins, and test the spacing on scrap first.
For a softer glow, roll a sheet of vellum or tracing paper into a slightly narrower tube and stand it inside the lantern. It hides the LED and turns the light into an even column. On A4 paper, trim the sheet to 25.5 cm long and space the cuts 1.5 cm apart for sixteen cuts and fifteen slats.
Tip
A group of three lanterns in closely related tones reads as one arrangement. Keep the diameter the same and vary the height by trimming the sheet before you fold it.
Several lanterns can also be hung in a row along a mantel or window, where they pair naturally with a paper garland of circles or flags in the same colors.
Frequently asked questions
Can I put a real candle in a paper lantern?
No. Paper catches fire easily and this lantern has no base or heat shield. Use only battery LED tea lights or battery micro LED string lights.
Can I cut the slats with scissors instead of a craft knife?
Yes, scissors will work because the cuts start at a fold. A craft knife and metal ruler give straighter, more evenly spaced cuts, which is what makes the lantern look clean and modern.
What size is the finished lantern?
Made from a US Letter sheet as described, it is about 3 inches (7.6 cm) across and a little under 8.5 inches (21.6 cm) tall. Trim the sheet shorter before folding if you want a lower lantern.