Paper Cutting Art: Design and Cut Your First Silhouette
A papercut must hold together as one piece of paper. Learn to design with bridges, then cut and mount a leafy branch silhouette.
Project at a glance
Materials
- Dark paper, 4.5 × 6.5 in (11.5 × 16.5 cm)
- Light cardstock for the ground, 5 × 7 in (12.7 × 17.8 cm)
- Tracing paper or copier paper for the design
- PVA glue
- Optional: 5 × 7 in frame
A papercut is a picture made by taking paper away. One sheet, usually dark, is cut so that what remains forms the image, then mounted on a contrasting ground. Paper cutting art is practiced in many traditions around the world, and organizations such as the Guild of American Papercutters exist to support people who do it today. The equipment is minimal. The real challenge is in the design: a papercut has to hold together as a single piece of paper, and learning to think that way is most of the craft.
The one rule: everything stays connected
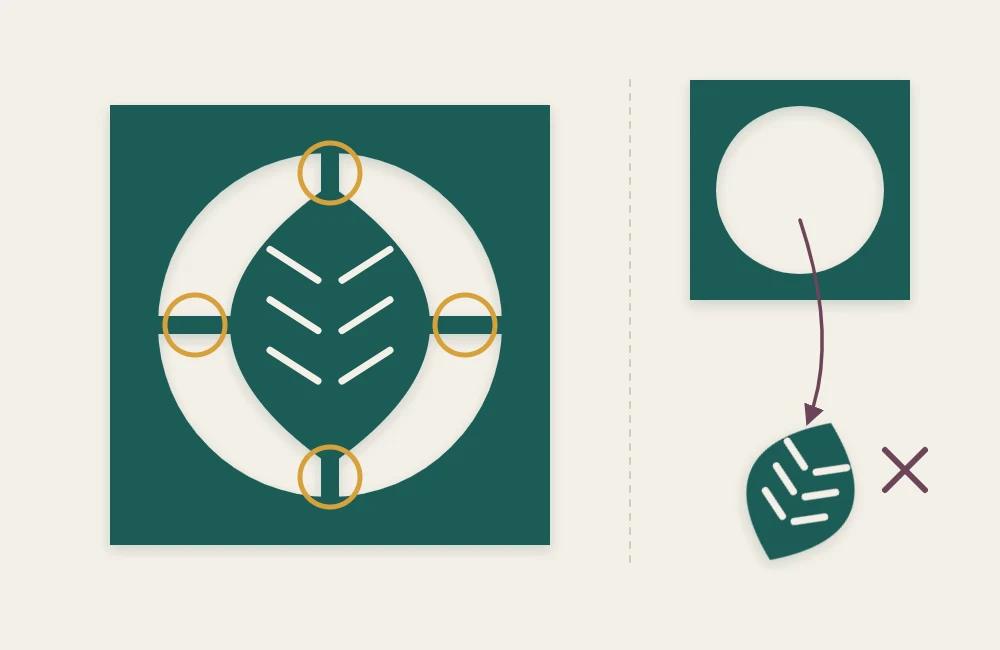
In a drawing, a shape can float anywhere on the page. In a papercut, any piece of paper that is completely surrounded by cuts falls out. Cut a ring around a circle and the circle drops onto the table. Such stranded pieces are often called islands, and avoiding them is the first thing a papercut designer learns.
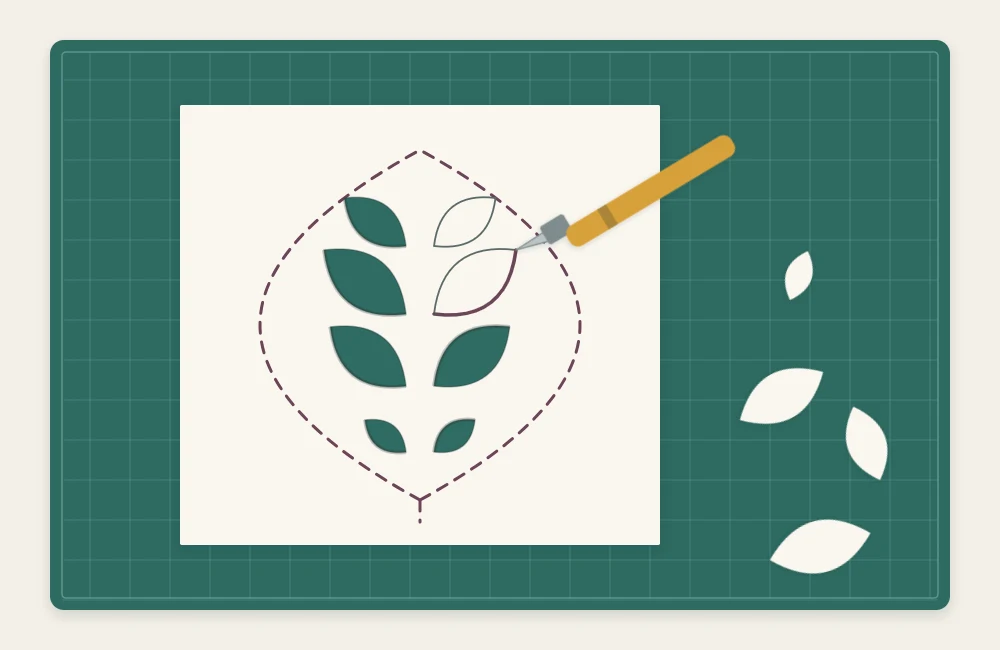
The solution is the bridge: a narrow strip of paper deliberately left in place to tie one part of the design to another. A stencil letter O shows the principle, with two small ties holding its center in place. In a good design the bridges are not obvious patches. They are disguised as stems, veins, branches, blades of grass, or the points where two shapes touch.
Designing your first silhouette
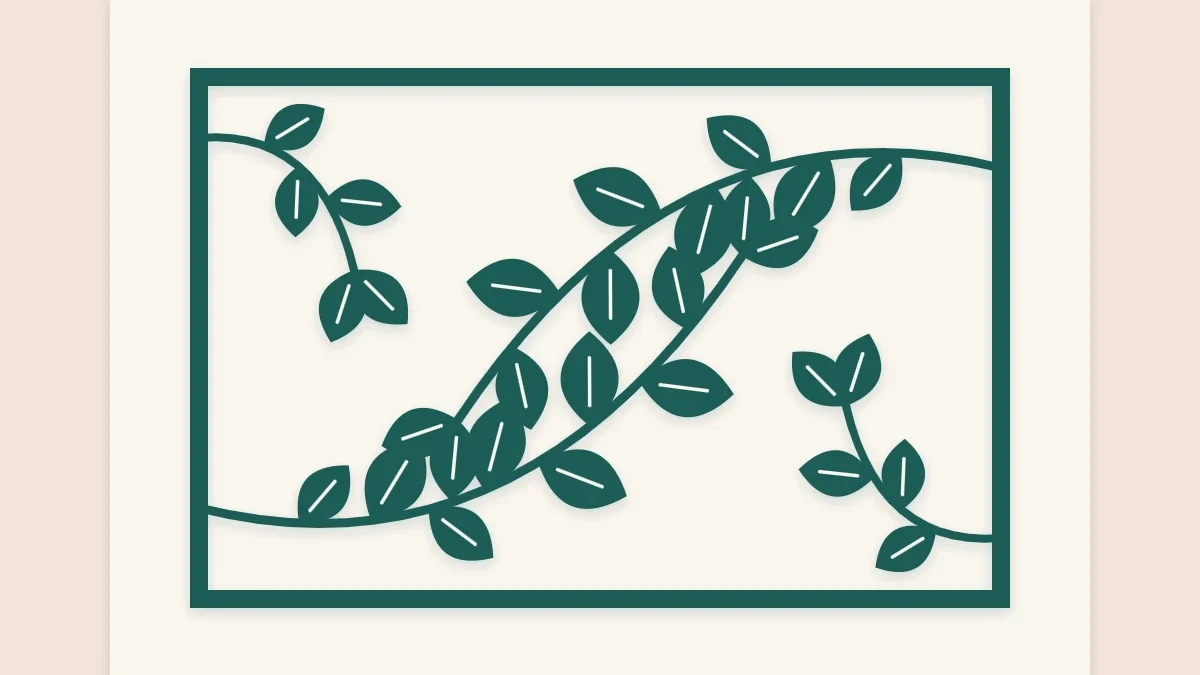
A leafy branch inside a rectangular border is a forgiving first subject. Stems are natural bridges, leaves can touch the border and each other, and small errors read as natural variation. Work on tracing paper or plain copier paper first, with these guidelines:
- Draw a border. A frame 1/4 in (6 mm) wide around the edge gives the design something to anchor to and makes the finished piece much easier to handle.
- Touch the border in several places. Aim for at least four or five contact points spread around the frame, so that no long section hangs unsupported.
- Keep bridges generous. For a first piece, nothing that remains should be narrower than 1/8 in (3 mm). Thinner lines are possible with experience, but they tear easily.
- Shade what will be removed. Fill every area to be cut away with pencil hatching. Then trace a path with your finger from each unshaded shape to the border. If you cannot get there without crossing a shaded area, add a bridge.
- Add interior cuts sparingly. A single slit down the center of a leaf suggests a vein and breaks up the solid shape. Stop each slit short of both ends of the leaf.
Design on a sheet of 4.5 × 6.5 in (11.5 × 16.5 cm). Mounted on a 5 × 7 in (12.7 × 17.8 cm) ground, that leaves a 1/4 in margin all around and fits a standard frame.
Paper, blade and surface
Choose a thin, strong paper: something in the range of 24 to 32 lb bond (about 90 to 120 gsm), colored through to the core. Black is traditional, but deep blue, forest green or oxblood all read clearly against a pale ground. Cardstock is hard work for detailed cutting and dulls blades quickly.
Use a craft knife with a pointed blade on a self-healing mat. A fresh blade matters more here than in any other paper project; a dull tip drags and tears instead of slicing, so change it as soon as you feel resistance. The general guide to paper craft tools covers knives and mats, and the mechanics of grip, pressure and corners are explained in clean cutting with a craft knife. This article assumes you can already make a controlled cut.
Transfer and cut
- Reverse the design. Turn your tracing over so the design is mirrored. Working on the back of the paper keeps pencil marks off the display side.
- Transfer it to the back of the dark paper. Tape the reversed tracing over the back of the sheet and go over the lines firmly, or rub soft pencil on one side of the tracing first so it acts as transfer paper. A white or silver pencil shows best on dark paper.
- Mark the waste. Put a small cross in every area that will be removed. It is surprisingly easy to cut out the wrong shape once the knife is moving.
- Cut the smallest interior shapes first. Begin with vein slits and the tight gaps between leaves, while the sheet is still whole and stiff.
- Work from the center outward. Move on to the larger openings, turning the paper so that you always pull the blade toward you.
- Cut away from weak points. At a narrow bridge or sharp corner, start the cut at the delicate spot and draw the knife away from it, rather than ending a cut there.
- Cut the outline last. Trim around the outside of the border only when everything inside is finished.
- Lift out stubborn pieces. If a waste piece will not drop free, do not pull it. Find the uncut fiber, usually in a corner, and slice it.
Tip
A bridge cut by accident can be repaired. Glue a sliver of the same paper across the break on the back. Once the piece is mounted, the mend is very hard to find.
Mounting the finished piece
Turn the papercut face up and check it against the light for missed fibers. For the ground, cut a 5 × 7 in piece of smooth white, cream or pale gray cardstock.
Apply adhesive to the back of the papercut very sparingly: tiny dots of PVA placed with a toothpick at the corners of the border and at a few points on the larger shapes. Lower the piece onto the ground, cover it with a clean sheet of scrap paper, and smooth it gently with the flat of your hand. Coating the whole back with wet glue tends to stretch and wrinkle thin paper.
A more dimensional option is to mount the papercut on thin spacers so that it casts a shadow on the ground, the same principle used in a layered shadow-box landscape.
Common first-piece problems
Fuzzy edges nearly always mean a dull blade. Overcuts at corners, where the knife runs past the end of a line, weaken bridges; slow down and stop just short, then finish from the other direction. A design that looks thin and spidery has had too much removed. Leave more paper than seems necessary, because the dark shape is the picture.
Other directions
Once a single-sheet silhouette feels manageable, the same thinking opens out. Folding the paper before cutting produces symmetrical designs, the principle behind six-point paper snowflakes. Reversing the logic, so the image is cut out and the surrounding sheet is kept, gives a stencil-like negative papercut. A favorite leaf, a pet’s profile or a familiar skyline all make good subjects, provided every part finds its way back to the border.
Frequently asked questions
What is a bridge in a papercut?
A bridge is a narrow strip of paper left uncut so that one part of the design stays attached to another. Without bridges, any shape completely surrounded by cuts would fall out.
What paper is best for papercutting?
A thin but strong paper of roughly 90 to 120 gsm that is colored all the way through. Cardstock is tiring to cut in detail and blunts blades quickly, while very thin paper tears at the bridges.
What should I do if I cut through a bridge?
Glue a small sliver of the same paper across the break on the back of the piece. Once the papercut is mounted, a careful repair is very hard to see.